March 2, 2026
Best DIY Easter Bunny Crafts for Kids

Easter is such an exciting time of year. The days get warmer and longer, the flowers begin to bloom, and the sweet signs of spring start to fill the air. Celebrate the season by making these fun and easy Easter bunny cards with your kids.
This kid-friendly, DIY Easter craft features a bunny place card and can easily be decorated with your favorite Easter chocolates. Get started with the directions and templates below. These easy-to-make bunny rabbit crafts make the perfect little treat for kids, teachers, and grandparents, or for decorating your Easter table.
Easter Bunny Place Card

Supplies:
Makes 4 cards
• cardstock:
- heavy-weight white (65-lb) – 3 sheets
- yellow – 1/4 sheet
- black – 1/4 sheet
• assorted filled chocolate Easter eggs
• paper punches:
- standard handheld hole punch
- small circle punch
- small heart punch
• glue stick
• double-sided tape
• black pen (fine point, felt tip)
• Easter Bunny head template
Instructions:
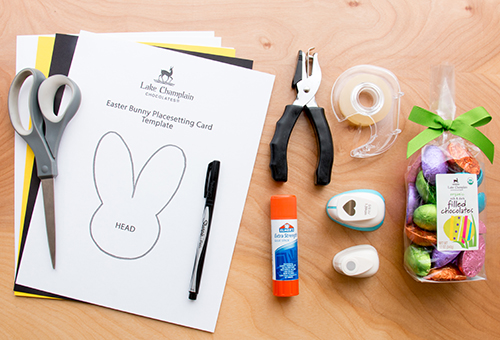
1. Start by gathering your materials. Print your template and cut out each element so that you can use them as stencils for creating your name tags.
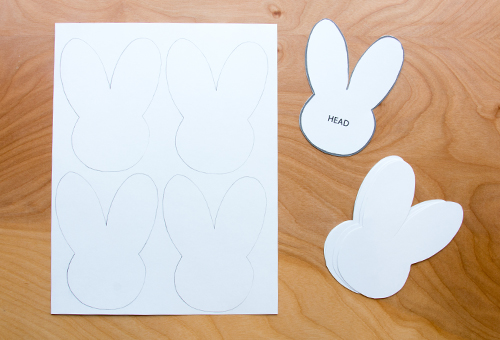
2. Trace the shapes marked head onto the white cardstock and carefully cut out each one.
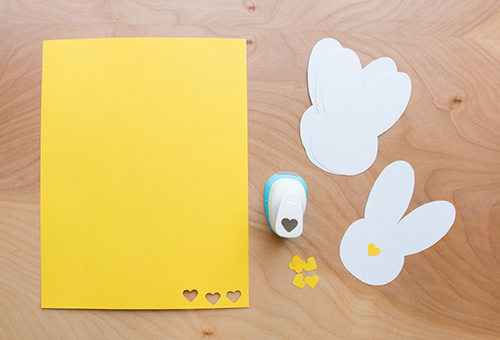
3. Using the heart-shaped paper punch and the yellow cardstock, cut out a heart. Glue this in the middle of the head to make your bunny’s nose.
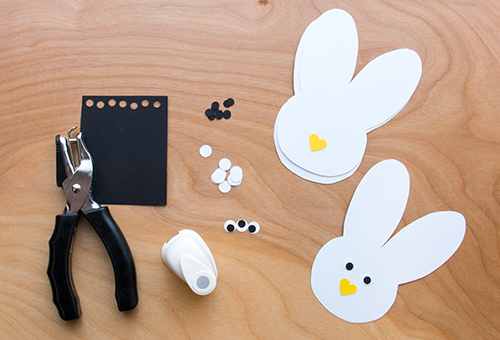
4. Use the small circle paper punch and the scraps of white card stock to create two small circles for the outer part of the eyes. Then, use the hole punch and the black cardstock, to create two black dots for the center of each eye. Glue a black dot to each of the small white circles. Then glue your eyes to your bunny face, just above the heart-shaped nose. Use the pen to then draw on the rest of the bunny face by adding a mouth and eyelashes. (To make this bunny into a name tag, simply write a name in place of the mouth.)
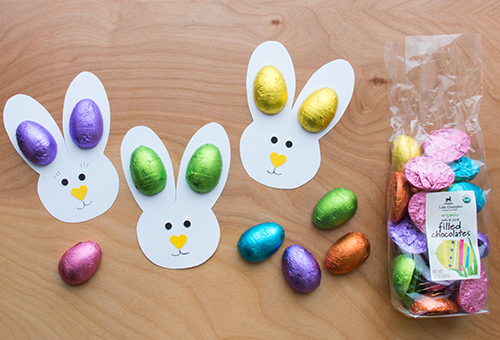
5. Now onto the yummy part. Use a one-inch piece of double-sided tape to attach a chocolate egg to each of your bunny ears. Mix and match flavors to create a colorful bunny, or pick two of your favorites like our peanut butter eggs.
(These place card holders can also be easily transformed into napkin holders. Simply measure and cut a 2-inch by 8.5-inch strip of cardstock. Glue the two short ends together to form a ring and then attach your bunny head to the side.)
Congratulations, your easy DIY Easter bunny cards are complete! Show us your finished designs. Share your extraordinary Easter bunny crafts with us on Facebook or Instagram (@LCChocolates). Be sure to include the hashtag #Easterbunnyfun for a chance to win a gourmet Easter basket!